Safety First: Protecting Yourself
Before starting any repairs, disconnect the battery's negative terminal to prevent accidental shocks. Wear safety glasses to protect your eyes from flying debris and work gloves to safeguard your hands. Work in a well-lit area, and never rush the process. Remember, your safety is paramount. A seemingly small mistake can lead to serious injury. For Craftsman parts, check out this helpful resource: drive belts.
Diagnosing Brake Problems
Understanding the symptoms is crucial for effective repair. Here are some common issues:
Weak Braking: This often signifies worn brake pads or shoes, low brake fluid (in hydraulic systems), or a stretched/damaged brake cable.
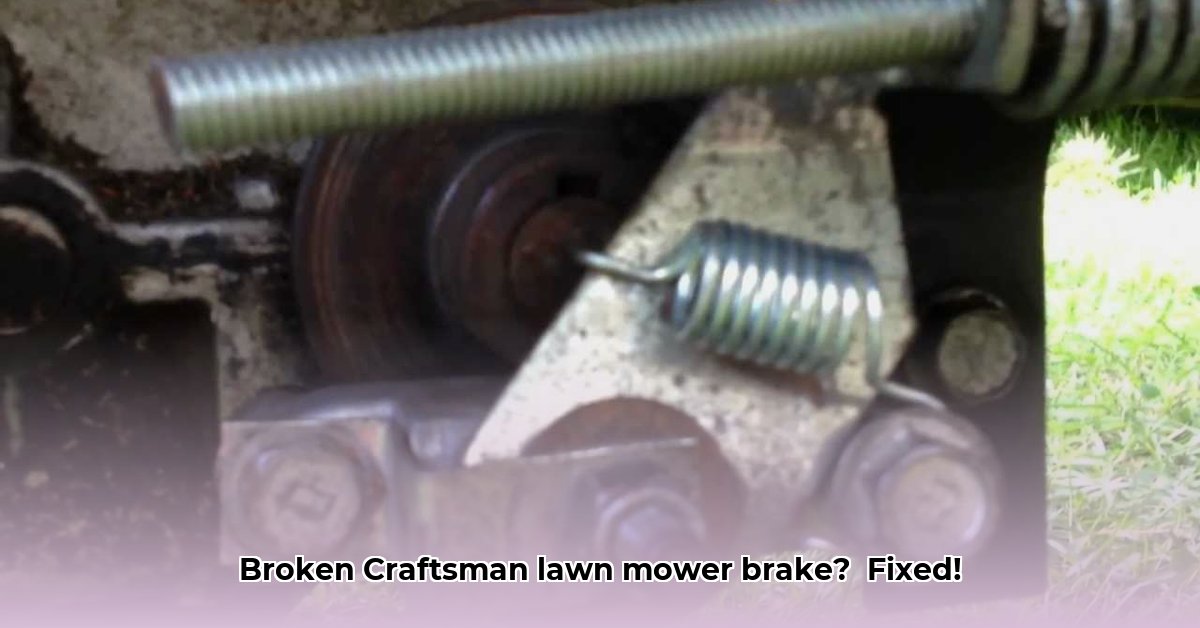
Brakes Sticking: This usually points to rust, dirt, or debris jamming the brake linkage, or sticky brake pads/shoes.
Complete Brake Failure: This is the most serious issue, suggesting a major component failure (e.g., a broken brake cable). Do not operate the tractor until this is resolved.
Did you know that 75% of lawn tractor brake failures are due to simple wear and tear? Regular inspection can prevent major problems.
Repairing or Replacing Brake Components
The following steps offer general guidance. Always consult your owner's manual for model-specific instructions and part identification. Improper repair can be dangerous.
1. Inspecting and Replacing Brake Pads or Shoes:
1. Secure the tractor (wheel chocks and parking brake, if functional).
2. Remove the wheel (consult your manual for specific instructions).
3. Examine the brake pads/shoes.  Replace if worn below the minimum thickness specified in your manual. Uneven wear suggests a potential underlying issue.
4. Reinstall the wheel, tightening to the manufacturer's specified torque.
2. Adjusting the Brake Cable (If Applicable):
1. Locate the brake cable adjustment (your owner's manual is essential here).
2. Carefully adjust the cable, making small adjustments and testing brakes between each.
3. Test thoroughly after adjustment for smooth and effective braking.
3. Checking and Cleaning the Brake Linkage:
1. Inspect the brake linkage (levers, rods, connections) for damage, rust, or debris.
2. Clean any rust or debris.
3. Lubricate moving parts with the lubricant specified in your owner's manual.
4. Replace any damaged or broken parts.
Have you ever experienced the frustration of searching for the right part? Knowing where to look can save significant time and frustration.
Sourcing Replacement Parts
Choosing the right parts is vital. Here are options:
Authorized Craftsman Dealers: Offers genuine parts and warranty protection. While often the most expensive option, they provide peace of mind.
Online Marketplaces (e.g., eBay): Offers wide selection and potentially lower prices, however, increases the risk of counterfeit or incompatible parts and shipping delays. Carefully verify seller ratings and part numbers.
Local Small Engine Repair Shops: Offers expert advice and quicker access to parts, but may have higher prices.
Always verify part compatibility before purchasing. Counterfeit parts are dangerous and can cause further damage.
Conclusion
This guide provides general advice. Your owner's manual is essential for accurate repair instructions and part identification specific to your Craftsman lawn tractor model. If you're unsure about any step, consult a qualified small engine mechanic. Safe brakes are crucial for your safety and the safe operation of your lawn tractor. Remember, regular maintenance is key to preventing costly repairs.